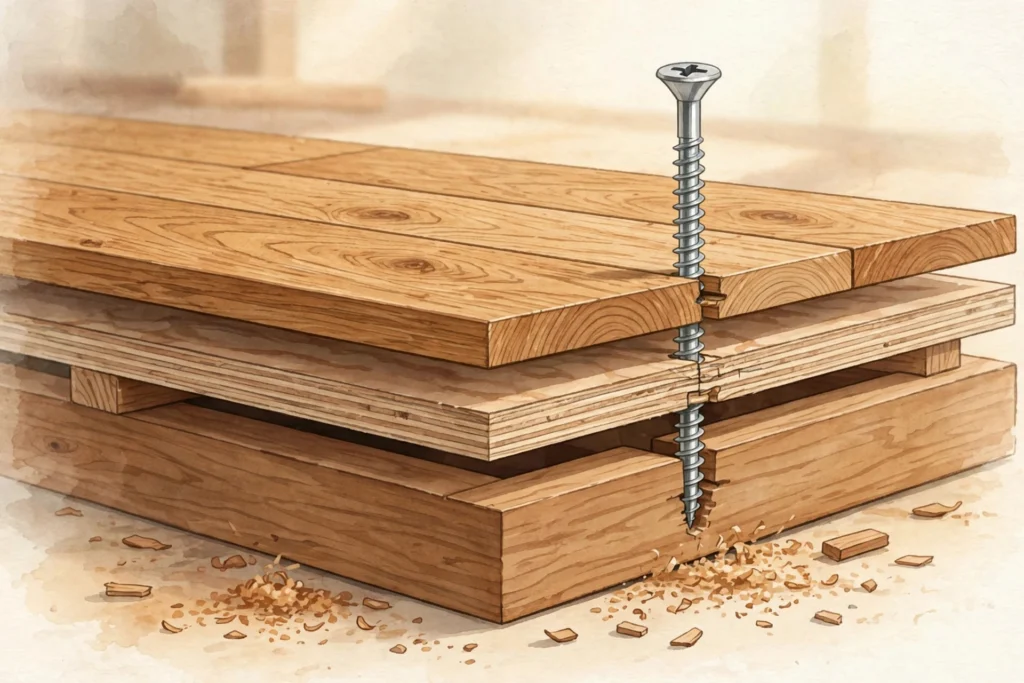
Few sounds are as annoying as a hardwood floor that announces every step. The good news: most squeaks are a simple friction problem, and fixing them is one of the most satisfying DIY jobs you can do. No ripping up floors, no refinishing — just a little detective work and a few fasteners.
This guide walks you through the whole job in the order you should actually do it: figure out exactly where the squeak is, try the easy stuff first, then fix it from above the floor or from below, depending on what you can reach. I’ll also tell you when a squeak is a warning sign of something bigger, and when it’s time to call a professional.
Why Do Hardwood Floors Squeak?
A squeak is almost always two pieces of wood rubbing against each other. The usual suspects:
- A board rubbing against a loose nail. The original nails worked a little loose over the years, and now the board rides up and down the nail shank with every step.
- The subfloor moving against the joist. A small gap opened up between the subfloor and the joist below it, so the whole sandwich flexes and rubs when you walk across.
- Boards rubbing against each other. Seasonal expansion and contraction can leave boards loose enough to squeak against their neighbors, especially in dry winter months.
- The subfloor rubbing a pipe or duct. Less common, but a pipe run through a tight hole in a joist can creak as the floor flexes around it.
In almost every case, the fix is the same idea: stop the movement. Pin the moving pieces together so nothing rubs, and the noise goes away.
How Do You Find the Exact Spot of a Squeak?
This is the step most people skip, and it’s the step that decides whether the repair works. A squeak you can hear across the room might come from a single loose spot the size of a dinner plate. Take ten minutes to pin it down.
Get a helper. Have someone walk slowly across the squeaky area while you listen and watch. Walk the same path several times — the squeak often shows up in the same exact spot when the same weight hits it.
Listen from below if you can. If there’s a basement or crawl space under the floor, have your helper walk while you stand underneath. You’ll hear the squeak much more clearly from below, and you can often see the subfloor flex at the exact spot. This is also how you confirm whether the noise is at a joist or between joists, which matters for choosing the right fix.
Mark the spot. Once you find it, mark an X on the floor with painter’s tape right over the squeak. If the squeak covers a wider area, mark the edges of the noisy zone with two pieces of tape. Squeaks have a way of “moving” once you start working, so having a visible target keeps you honest.
Check the direction of the boards and joists. Hardwood boards usually run perpendicular to the floor joists. Knowing which way the joists run tells you where solid wood is underneath — that’s where your fasteners need to land. From below, it’s obvious. From above, you can find joists by tapping the floor and listening for the solid thud (versus the hollow sound between joists), by measuring 16 inches on center from a wall in many homes, or by pulling a piece of baseboard or a floor vent and peeking at the subfloor edge.
Test before you commit. Before driving anything permanent, have your helper stand on the marked spot while you press down firmly on it from above or wedge something snug from below. If the squeak stops under pressure, you’ve confirmed the spot and the fix will almost certainly work.
Are There Quick Temporary Fixes for Squeaky Floors?
If you need the noise gone tonight and can’t do a real repair yet, a couple of stopgaps can buy you some quiet. Be honest with yourself about these: they’re temporary.
Powdered lubricant in the seams. Work a dry lubricant — talcum powder, powdered graphite, or even powdered soapstone — into the seams between the squeaky boards. Lay down newspaper, sprinkle it on, then work it into the joints with an old paintbrush or a soft cloth, stepping on the boards as you go to open the seams slightly. The powder reduces the friction between boards. It won’t fix a subfloor-to-joist squeak, but for board-on-board rubbing it can quiet things down for weeks or months. (Skip liquid oils — they’ll stain the wood and make future repairs harder.)
A squirt of construction adhesive from below. If you can reach the squeaky spot from underneath and it’s just a small gap between the subfloor and a joist, running a bead of construction adhesive into that gap can silence it fast. This one actually borders on a permanent fix — see the “from below” section for how to do it right.
Can You Fix Squeaky Floors from Above the Floor?
Yes — and for most homeowners, this is the best place to start, because you don’t need basement or crawl space access. The idea is simple: drive a fastener through the hardwood and subfloor into the joist below, pulling everything tight so nothing moves.
Should You Use Screws or Nails?
Screws. Nails are what caused the problem in the first place — smooth-shank nails work loose over decades of seasonal movement, and the board starts sliding up and down the nail. Screws have threads that grip the wood and hold the sandwich together permanently. For squeak repair, screws win every time. If you re-nail a squeak, expect it to come back.
How Do Squeak Repair Kits Work?
Purpose-built squeak repair kits exist for exactly this job, and they’re worth it for most people. The concept is the same across the popular kits: you use an included fixture to drive a special scored screw through the floor into the joist, and the screw’s head snaps off just below the floor surface, leaving only a tiny hole to fill.
The two kits you’ll see mentioned most are the Squeeeeek No More kit (from O’Berry Enterprises) and the Counter-Snap kit (from Squeaky Floor Repair). Both use the same basic idea — scored breakaway screws that snap off below the surface — but they differ in the fixtures, the types of screws, and whether they handle carpeted floors too. The Squeeeeek No More system includes fixtures for both bare hardwood and carpeted floors, plus joist-finding screws; the Counter-Snap kit is aimed at hardwood and stairs. I’ll put them head to head in a full comparison post soon, because the details matter depending on your floor.
The general process with any of these kits:
- Locate the joist. The screw has to bite into solid joist wood, not just subfloor. Use the kit’s joist-finding screw or a finish nail as a probe: drive it at your marked spot and feel whether it hits solid wood after passing through the flooring and subfloor. If it sinks freely, you’re between joists — move over a half inch and try again.
- Set the fixture on the mark. The fixture holds your drill at the right angle and controls depth.
- Drive the screw straight down. Keep the drill at 90 degrees — straight, not angled. Drive until the fixture stops you or the screw head snaps. Don’t force it past the snap.
- Fill the hole. Dab in filler, smooth it flush, and you’re done.
A note on screw angle: drive straight down. An angled screw can wander off the joist or split the flooring tongue. The kits’ fixtures exist precisely to keep you at 90 degrees — let them do their job.
What If the Squeaky Floor Is Under Carpet?
If there’s carpet over the squeaky area, you have two options. The Squeeeeek No More kit includes a tripod fixture designed to go right through carpet: it parts the carpet fibers, you drive the scored screw through into the joist, the head snaps off below the surface, and the carpet fibers close back over the spot. It works — carpet is forgiving about hiding small holes.
The alternative is to pull the carpet back in the squeaky area, do a bare-floor repair, and re-stretch the carpet. That’s more work but gives you full visibility of what you’re fastening into. If the squeak is right at a carpet seam or near a wall, pulling it back is often easy enough to be worth it.
What If You Hit a Pipe or a Wire?
Stop immediately. If your probe or screw hits something that isn’t wood — you’ll feel a sudden hard stop, or the screw refuses to advance — back it out and move at least two inches to either side. Floors can hide plumbing runs, electrical cable, and in some homes, radiant heating tubing. Never force a fastener through resistance that doesn’t feel like wood.
If your home has in-floor radiant heat, be extra careful: driving fasteners from above is risky, and the from-below methods (shims, adhesive) are much safer choices.
How Do You Hide the Screw Holes?
A snapped-off screw leaves a small hole — typically around 1/8 inch — that needs filling. Here’s how to make it disappear:
- Wax filler sticks (sometimes called fill crayons) are the easiest option. Pick a color that matches your floor, rub it into the hole, and buff off the excess with a soft cloth. They come in multipacks of wood tones.
- Colored wood putty works for slightly larger holes. Press it in with a putty knife, let it dry, and sand lightly if needed.
- Furniture touch-up markers can add grain detail over the filled spot so it blends with the surrounding board. A couple of light strokes along the grain direction make a surprising difference.
Fill the hole slightly proud of the surface, then level it once dry. On most floors, you won’t find the spot again unless you know where to look.
Can You Fix Squeaks Without Drilling from Above?
If you’d rather not put any holes in your finished floor — say it’s a historic floor or an expensive exotic wood — your options are the temporary fixes above, or the from-below repairs below. There’s no reliable way to permanently pull a floor tight to a joist without a fastener or adhesive reaching the joist. Adhesive from below (next section) is the most invisible permanent fix available.
How Do You Fix Squeaky Floors from Below?
If you can get under the floor — unfinished basement, crawl space, or by pulling ceiling drywall in a pinch — from-below repairs are the gold standard. Nothing touches the finished surface, and you can see exactly what’s moving. Grab a headlamp and have your helper walk the squeaky spot while you watch.
Can You Shim a Squeak from Below?
Yes, for the most common case: a gap between the subfloor and the joist. You’ll see the subfloor flex down toward the joist (or the joist flex up toward the subfloor) with each step.
- Find the exact spot while your helper walks.
- Take a thin wood shim, coat it lightly with wood glue, and tap it gently into the gap between the top of the joist and the underside of the subfloor.
- Don’t force it. The shim should be snug, not driven hard. Hammering a shim in too tight can lift the flooring above and create a hump — or a new squeak. Snug is enough; the glue does the real holding.
- Score the shim with a utility knife and snap off the excess sticking out past the joist.
This is a five-minute fix that lasts for years. Keep a bundle of cedar shims on hand — they’re cheap and you’ll use them elsewhere in the house too.
Does Construction Adhesive Work on Floor Squeaks?
Construction adhesive (the kind in a caulk tube, polyurethane-based) is one of the best squeak fixes there is when applied from below. Run a generous bead along both sides of the joist where it meets the subfloor, in the squeaky area and a foot or two in each direction. The adhesive fills the gap and bonds the subfloor to the joist, stopping the rubbing permanently once it cures.
Use a caulk gun, wear gloves, and give it a full 24 hours to cure before judging the result. This works best where the gap is small and consistent. If the gap is large or the subfloor is visibly bouncing, combine adhesive with shims: shim first, then run the adhesive bead over the shimmed joint.
What About Screwing Up from Below?
You can drive screws up through the joist into the subfloor — but not through the joist into the finished hardwood. The screws must stop in the subfloor. Measure carefully: add the thickness of the joist you’re screwing through to the thickness of the subfloor, and choose a screw shorter than that total so the tip never reaches the finished floor above. A screw tip poking through hardwood is a disaster you’ll feel every time you walk barefoot.
A safer variation: drive short screws up through the subfloor into the bottom of the hardwood boards between joists, where boards are cupping or moving against each other. Same rule — measure twice, and keep the tips well below the finished surface.
How Do You Fix a Squeak Between Joists?
Sometimes the squeak isn’t at a joist at all — it’s the subfloor flexing between two joists, or two boards moving against each other mid-span. For that:
- Blocking: Cut short pieces of 2x lumber to fit snugly between the two joists under the squeak, and screw or nail them in place. The blocking stiffens the subfloor and stops the flex. Cut them just shy of the joist spacing so they tap in snug without forcing the joists apart.
- Sistering: If a joist itself is flexing or damaged, fasten a new joist (or a length of 2x lumber) alongside the old one — “sistering” it. Construction adhesive plus screws or through-bolts every 12 to 16 inches makes the pair act as one stiffer member. This is the fix for bounce, not just noise.
- Metal squeak-elimination brackets: Bracket kits (like the Squeak-Ender style) mount to the joist and use a screw plate to pull the subfloor down tight from below. They work well and involve no guesswork about screw length, since the bracket controls the depth.
What If There’s No Access from Below?
Finished basement ceiling in the way? You have options, in order of effort:
- Fix from above with a squeak repair kit (covered above).
- Pull a small section of ceiling drywall under the worst squeak. A 2×2 foot patch is a manageable drywall repair, and it gives you full access to shim and glue. If you have several squeaks in one area, one patch can serve all of them.
- Go through a floor vent or plumbing access panel if one happens to be near the squeak.
When Does a Squeak Mean a Bigger Problem?
Most squeaks are harmless noise. But a squeak can also be a symptom of real structural trouble. Pay attention if you notice any of these:
- The floor bounces or feels spongy underfoot, not just noisy. That suggests the subfloor is damaged or a joist is failing.
- Visible sagging — a dip you can see or feel with a straightedge.
- Water stains, soft spots, or a musty smell near the squeak. Water damage rots subfloors and joists, and a squeak is often the first sign. Find and fix the moisture source before anything else.
- Cracked, split, or notched joists visible from below. An over-notched joist (cut too deep for plumbing or wiring by a previous owner) loses a lot of strength.
- Squeaks that multiply or spread over a few months across a large area. One new squeak is normal settling; a growing chorus deserves a look.
- Termite or carpenter ant evidence — frass (sawdust-like droppings), hollow-sounding wood, or visible tunnels.
When Should You Call a Professional?
Call a flooring contractor or a structural specialist when:
- You suspect water damage, rot, or insect damage.
- A joist is cracked, split, or badly notched and needs sistering or replacement — that’s structural work.
- The subfloor itself is delaminating or crumbling (common with older particleboard subfloors).
- The squeak is over a slab or over radiant heat and you’re not comfortable with the risks.
- You’ve tried the DIY fixes and the squeak persists — a pro with a moisture meter and a trained eye can find what you’re missing.
A single-room squeak repair is a small job; most flooring contractors will handle it without a fuss. Get the diagnosis right first, and you’ll know exactly what to ask for.
Frequently Asked Questions
-
Will a squeaky floor go away on its own?
Sometimes, temporarily. Squeaks often get louder in dry winter months when wood shrinks, and quieter in humid summer months when it swells. But a squeak caused by loose fasteners or a subfloor gap won’t fix itself — the movement only gets worse over time. If it’s annoying you now, fix it now.
-
Is it safe to screw through hardwood into the joist?
Yes, when done correctly. The screw passes through the hardwood, the subfloor, and into the joist, pulling all three tight. Use a squeak repair kit or drill a pilot hole first, drive the screw straight (not angled), and make sure you’re actually hitting the joist — a screw that misses the joist and just spins in the subfloor won’t fix anything and can make the hole bigger.
-
Can I fix squeaks in a floor that’s under carpet?
Yes. Squeak repair kits with a carpet fixture are designed to drive scored screws right through the carpet into the joist; the screw head snaps off below the surface and the carpet fibers close over the spot. Alternatively, pull the carpet back, repair the bare floor, and re-lay the carpet.
-
How do I find the joist without tearing up the floor?
Tap the floor and listen for the solid sound over a joist versus the hollow sound between joists; measure 16 inches on center from a wall (the most common spacing); look at the subfloor edge behind a piece of removed baseboard or a floor vent; or use a finish nail as a probe at your marked spot — solid resistance after the subfloor means you’ve found it. As a last resort, a deep-scan stud finder can sometimes read through flooring, though thick hardwood plus subfloor defeats most of them.
-
Will baby powder or talcum powder really stop a squeak?
It can quiet board-on-board squeaks for a while by reducing friction in the seams. It’s not a structural fix and it won’t help subfloor-to-joist squeaks. Think of it as a quick quiet-down, not a repair.
-
Should I use nails or screws to fix a squeak?
Screws. Smooth nails are the reason most floors squeak in the first place — they work loose over years of wood movement. Screws grip with threads and hold the layers together permanently. If a contractor suggests re-nailing a squeak, ask for screws instead.
-
What should I do if I hit something hard while driving a screw?
Stop and back the screw out. Floors can hide pipes, electrical cable, and radiant heat tubing. Move at least two inches to either side and try again. Never force a fastener through resistance that doesn’t feel like wood.
-
How much does it cost to have a professional fix squeaky floors?
For a straightforward squeak repair in one room, expect a modest service call — often in the low hundreds of dollars, depending on your area and how many spots need work. If the squeak turns out to be water damage, rot, or a structural joist problem, the cost goes up with the scope of the repair. Getting the diagnosis right (using the steps at the top of this guide) is what keeps the bill small.
The Bottom Line
Fixing a squeaky hardwood floor comes down to three steps: find the exact spot, stop the movement, and hide your tracks. From above, a squeak repair kit and a few breakaway screws will silence most squeaks in an afternoon. From below, shims and construction adhesive do the same job without touching the finished floor. Either way, screws beat nails, snug beats forced, and a little painter’s tape at the start saves a lot of guessing later.
And if the floor is telling you something bigger — bounce, sag, water, or damage — listen to it and bring in a pro. A squeak is cheap to fix. A rotted joist isn’t.