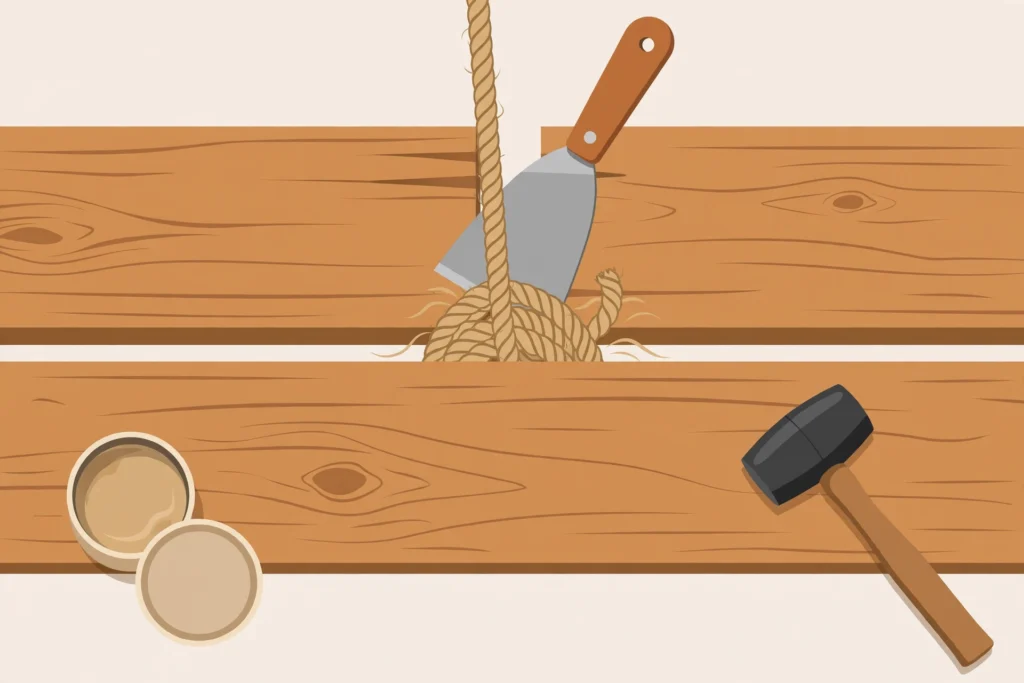
There is no single correct way to fix gaps in hardwood floors — there are several, and choosing the wrong one is the most common DIY mistake in floor repair. The right method depends on two things: how wide the gap is, and whether it is still moving. A hairline seasonal gap needs humidity, not filler. A stable narrow gap wants wood filler. A wide gap needs rope caulk or a glue-in wood sliver. Get the match wrong and the repair will crack, crumble, or pop out within a season.
This guide works through each method in order, from the essential first step (measuring and checking humidity) through the specific repair for every gap size, ending with the one warning that matters most: never lock a moving floor in place with rigid filler.
Step 0: Measure the Gap and Check the Season
Before buying anything, diagnose. You need three pieces of information:
1. How wide is the gap? Slide a feeler gauge or a credit card (about 1/32 inch thick) into the gap. Measure at several points along the gap and in several rooms. Note the widest measurement — that is the one that dictates the method.
2. Is the gap moving? This is the question everything hinges on. If you can, measure the same gap in winter and again in summer. A gap that opens in the heating season and closes in the humid season is a seasonal gap — it is still moving, and it must not be filled with anything rigid. A gap that stays the same width year-round is stable, and safe to repair physically.
3. What is the indoor humidity? A cheap hygrometer reading tells you whether the floor is living in dry air. If the room reads under 35% relative humidity in winter and the gaps are seasonal, humidity correction comes before any repair. The flooring industry’s standard comfort range for hardwood is roughly 35–55% relative humidity.
Write down your findings. Every method below starts from them.
The Rule That Governs Everything: Fix Humidity First
If your gaps are seasonal — opening in winter, closing in summer — the repair is environmental, not cosmetic. Raising indoor humidity back into the 35–55% range lets shrunken boards reabsorb moisture and swell, and most seasonal gaps will close on their own over a few weeks. No filler, no rope, no tools needed.
For homes with forced-air heating, a whole-house humidifier connected to the HVAC system is the most reliable fix because it holds the entire home steady. Give it several weeks of consistent humidity before deciding which gaps still need physical repair.
Skipping this step is how most gap repairs fail. Filler placed into a winter-shrunken gap is filler placed into a gap at its widest — when summer swelling returns, the boards push together and something has to give. Usually it is the filler.
Narrow Seasonal Gaps (Under ~1/8 Inch, Still Moving): Humidify, Don’t Fill
This is the most common gap scenario and the one most often repaired wrong. Narrow gaps that appear each winter and vanish each summer are the floor’s normal breathing. The correct “repair” is humidity control, full stop.
What to do:
- Bring indoor humidity into the 35–55% range and hold it through the heating season.
- Redirect heat registers that blow directly onto the floor, which over-dry local areas.
- Seal obvious air leaks near exterior walls, where cold dry air infiltrates and dries the floor locally.
- Wait. Boards can take several weeks to reabsorb enough moisture to close gaps, especially thick solid stock.
Do not fill these gaps with wood filler, caulk, or anything else rigid. The boards will swell in summer and crack or eject the repair. Leave moving gaps alone and let the air do the work.
Small Stable Gaps (Under ~1/8 Inch, Not Moving): Wood Filler
Once you have confirmed a narrow gap is stable — same width in winter and summer, humidity already in the normal range — wood filler is the right tool. These are typically age-related gaps or the leftovers from a first-year acclimation shrink that never fully recovered.
How to do it well:
- Clean the gap thoroughly. Vacuum out dust and debris, and scrape out any crumbly old filler. Filler bonds poorly to dirt.
- Choose the right filler. Use a solvent-based or latex wood filler rated for floors (not generic wall spackle, which is too soft). For stained floors, buy filler tinted to match, or a stainable filler you can color after it cures.
- Overfill slightly. Press the filler firmly into the gap with a putty knife, leaving it just proud of the surface. Filler shrinks a little as it cures.
- Let it cure fully. Follow the product’s cure time — rushing this step causes shrinkage cracks.
- Sand flush and finish. Sand smooth with fine-grit paper, vacuum the dust, then touch up with matching stain and a coat of polyurethane or the floor’s existing finish type. Unfinished filler absorbs dirt and stands out within months.
Two honest limitations: filler is rigid and brittle, so it is only appropriate where you are certain the gap is done moving. And color matching is the hard part — filler that matches wet may dry lighter or darker. Test in a closet or under furniture first.
Wide Gaps (1/8 to ~1/4 Inch): Rope or Jute Caulking
For gaps too wide for filler to span without cracking, the traditional craftsman’s fix is rope caulking: pressing a natural fiber rope (jute, hemp, or cotton cord) into the gap. Unlike rigid filler, rope has slight give, so it tolerates the small residual movement that wide gaps often still have.
How to do it:
- Confirm the gap is stable with the winter/summer comparison. Rope tolerates minor movement, but a gap that swings wildly with the seasons still wants humidity correction first.
- Size the rope to the gap. The rope should be slightly larger in diameter than the gap so it wedges in snugly. Common sizes run 1/4 to 3/8 inch for typical wide gaps.
- Clean the gap with a vacuum and a narrow tool. Any grit under the rope will show.
- Press the rope in firmly along the full length, using a putty knife or a dedicated rope-packing tool to seat it just below the board surface — not flush, and not bulging above it. Some installers run a thin bead of wood glue or stainable caulk alongside for extra hold, but the friction fit does most of the work.
- Stain to match if the rope color clashes with the floor. Natural jute takes wood stain reasonably well; test on a scrap piece first.
Rope caulking has been used for generations because it works: it fills wide gaps invisibly from standing height, stays put, and does not crack the way a thick wad of filler does. Its weakness is deep gaps in high-traffic areas, where the rope can eventually work loose — check it every year or two and re-seat as needed.
Wide Gaps (1/4 Inch and Up, or Gaps You Want Invisible): Glue-In Wood Slivers
When a gap is very wide, or when you want the repair to disappear completely, the best method is to fill it with actual wood: a thin sliver or strip of matching hardwood glued into the gap. This is the most invisible repair because the patch is the same material as the floor — it takes stain like the surrounding boards and expands and contracts with them.
How to do it:
- Source matching wood. The ideal sliver comes from the same species as the floor. Flooring offcuts from the original installation are perfect; otherwise, buy a small quantity of unfinished strip flooring in the same species. The grain direction of the sliver should run parallel to the boards.
- Size the sliver. Cut or plane the strip to fit the gap snugly along its full length — slightly oversized so it needs light tapping to seat. Gaps are rarely uniform, so check the fit every few inches.
- Glue and seat. Run wood glue along both sides of the gap (not just the bottom), tap the sliver in with a mallet and a scrap block, and wipe excess glue immediately with a damp cloth. Glue squeeze-out left to dry will block stain absorption and leave a pale line.
- Trim flush. Once the glue cures, trim the sliver flush with a sharp chisel or a flush-cut saw, then sand smooth.
- Stain and finish to match the surrounding floor, following the same test-first rule as with filler.
This is more labor than filler or rope, but it is the professional-grade answer for wide gaps: a wood sliver moves with the floor instead of fighting it, and a well-matched repair is nearly undetectable.
Gap-Fixer Tools: Tapping Boards Back Together
A separate category of fix addresses a different problem: boards that have drifted apart but are not actually shrunk — they have just slid. This happens near the ends of runs, at thresholds, and anywhere foot traffic has nudged boards over the years. If a gap closes when you push the board with your foot, the board has moved, not shrunk.
[AFFILIATE: hardwood floor gap fixer tool] — a weighted tapping block with a gripping face — is designed for exactly this. You set it on the loose board and strike it with a mallet, driving the board back tight against its neighbor. A bead of wood glue in the tongue-and-groove joint before tapping keeps it from drifting again.
This tool only helps when the gap is caused by board drift, not shrinkage. If the gap is uniform along the board’s length, the wood has shrunk — tapping will not help and forcing it can damage the tongue-and-groove joint. Diagnose first, tap second.
The Big Warning: Never Fill a Moving Gap With Rigid Filler
This deserves its own section because it is the single most common and most destructive mistake in gap repair.
A seasonal gap is a gap at its widest in winter and its narrowest (or gone) in summer. Filling it with rigid wood filler, epoxy, or hard caulk locks the joint at its winter width. When summer humidity swells the boards, they press together with nowhere to go, and the filler — the weakest thing in the joint — loses. It cracks, crumbles, or gets squeezed up out of the gap in ugly ridges. By the next winter you have the original gap back, plus filler debris and possibly damaged board edges.
The sequence that actually works:
- Humidify through one full heating season.
- Re-measure the gaps in late spring, when the floor is at its widest.
- Fill only the gaps that remain, using the method matched to their size.
- Accept the hairlines that come and go. They are the floor breathing.
If you have already filled seasonal gaps and the filler is cracking, the fix is not better filler — it is removing the failed filler, correcting the humidity, and only then re-repairing what is still open.
Preventing Gaps From Coming Back
Repairs last when the environment stays stable. The prevention checklist is short:
- Hold 35–55% relative humidity year-round. This single habit prevents more gaps than any repair product.
- Run the HVAC before and during any flooring work. New flooring should be installed with the home at normal living conditions, and acclimated in the home for the manufacturer’s recommended period (usually at least 72 hours).
- Keep water away from the floor. Wipe spills promptly, fix plumbing leaks fast, and never wet-mop hardwood.
- Mind the sun and the vents. Heavy direct sun and heat registers blasting onto the floor create localized dry zones; rugs, redirectors, and window coverings even out the exposure.
Gaps often come with surface wear from grit collecting in the seams — see how to fix scratches on hardwood floors for restoring a scratched finish.
Frequently Asked Questions
What is the best way to fix gaps in hardwood floors?
Match the method to the gap: humidify seasonal gaps under 1/8 inch, use wood filler for small stable gaps, rope or jute caulking for gaps 1/8 to 1/4 inch, and glue-in wood slivers for wider gaps. Always correct humidity before filling anything.
Can I use wood filler on all floor gaps?
No. Wood filler only belongs in stable gaps that do not change with the seasons. Filling a seasonal gap with rigid filler will fail — the boards swell in summer and crack or push out the filler. Confirm the gap is stable with a winter/summer comparison first.
How do I fix large gaps in hardwood floors?
For gaps 1/4 inch and wider, glue-in wood slivers cut from matching hardwood are the best repair — they blend invisibly and move with the floor. Rope or jute caulking is a faster traditional alternative for moderately wide gaps.
Will a humidifier close gaps in hardwood floors?
Yes, for seasonal gaps. Raising indoor humidity to 35–55% lets shrunken boards reabsorb moisture and swell back. Allow several weeks of steady humidity before judging, and only repair the gaps that remain.
What should I put in floor gaps: caulk or wood filler?
For narrow stable gaps, purpose-made wood floor filler is better than standard caulk — it sands flush and takes stain. For wider gaps, natural fiber rope caulking outperforms both because it has slight give and will not crack. Avoid silicone or latex wall caulk on hardwood; it looks wrong and fails under foot traffic.
Do floor gap fixer tools really work?
They work for one specific problem: boards that have drifted apart from foot traffic and can be tapped back together. Push the board with your foot — if the gap closes, drift is the cause and the tool will help; if not, the wood has shrunk and tapping will only stress the joints.
Should gaps be fixed in winter or summer?
Do humidity correction in winter, when gaps are at their worst. Do physical repairs (filler, rope, slivers) in late spring or summer, when the boards are at their widest — that way you are filling the gap at its smallest, and nothing gets squeezed out later.
How do I keep gaps from coming back after repair?
Keep indoor humidity between 35 and 55 percent year-round, fix leaks promptly, and avoid blasting heat directly onto the floor. Stable humidity is the only long-term prevention; every repair method fails eventually if the air keeps swinging.
The right gap repair is never about the product — it is about the diagnosis. Measure the gap, check whether it moves with the seasons, fix the air first, and only then choose the method that fits the size. Do that, and the repair you make this year will still be holding next year.