
In case you’ve ever lived in an previous home you might have observed a small little piece of trim working horizontally someplace within the high 12” of your wall. There’s a good likelihood that small piece of molding is an extremely distinctive, and purposeful, molding referred to as image rail.
Image rail molding, is a kind of wall trim used to hold footage with out damaging partitions. They had been often made from wooden, and types ranged from easy, straight-edged designs to extra elaborate, ornamental moldings.
Historical past of Image Rail
Image rail dates again to the early nineteenth century, with its origins tied to the Victorian period, which spanned from 1837 to 1901, however its recognition stretched into the early twentieth century properties as late because the Nineteen Thirties.
- Victorian Period (1837-1901): Image rails had been a staple in Victorian properties, typically present in parlors and eating rooms the place ornamental objects had been prominently displayed.
- Edwardian Period (1901-1910): Their use continued into the Edwardian interval, with easier designs in comparison with the extra ornate Victorian types.
- Early twentieth Century: Image rails remained widespread in properties constructed up till the Twenties and Nineteen Thirties. They had been an ordinary function in lots of Colonial Revival, Craftsman, and Bungalow-style properties.
It was designed to permit owners to hold paintings, pictures, and different ornamental objects with out placing nails straight into the plaster partitions or wallpaper that was standard and costly on the time.
The paintings would then be hung utilizing braided wire, chain, or wire connected to the again. which might hold on a hook designed to latch onto the wooden molding.
This ingenious design additionally allowed the paintings to be simply moved wherever within the room by repositioning the hook alongside the image rail. The paintings may be raised or lowered by lengthening or shortening the wire. With image rail you would change the structure of all of the paintings on a regular basis in case you needed to with out ever having to restore your plaster partitions.
Decline in Use
The usage of image rails started to say no sharply after World Conflict II for a number of causes.
- Drywall: The introduction of drywall made wall surfaces simpler to patch and hold issues on, decreasing the necessity for image rails
- Trendy Aesthetics: Mid-century trendy design favored cleaner, extra minimalist traces with out the additional trim work and wallpaper types of earlier occasions
- Value and Labor: As development strategies centered extra on velocity and slicing prices with the growth within the suburbs the price and labor related to putting in image rail turned much less justifiable
Design & Kinds
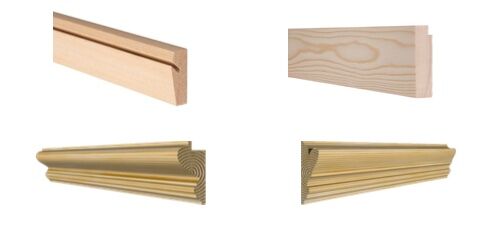
Traditionally, there weren’t a variety of varieties within the design of image rail. Beneath are a number of the most typical types in historic properties from the nineteenth and early twentieth century. These are straightforward to seek out from suppliers on-line and have modified little through the years.
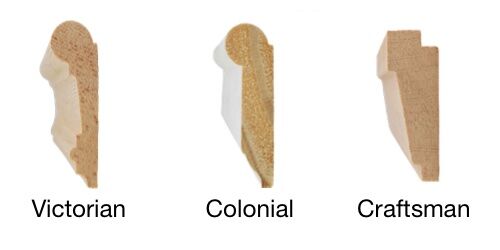
At this time there are extra trendy choices out there to suite a variety of completely different types and I’ve included a small pattern of some which are out there.
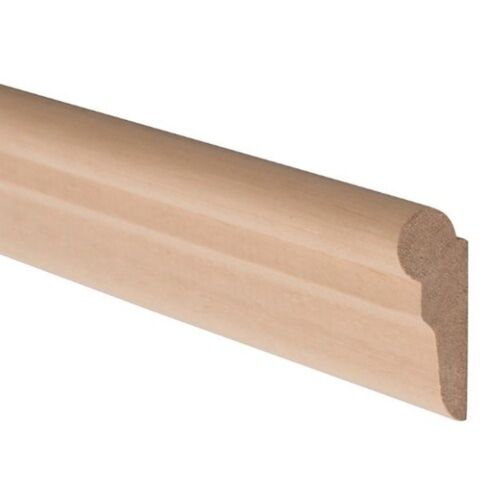
The defining attribute of image rail molding is that’s has both a hole again on the high of the molding or a slot lower into it that may settle for an image rail hook. Talking of hooks let’s take a peek at a number of the types out there.
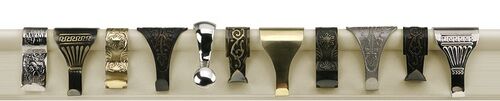
Image Rail Hooks
In contrast to molding types there are a fully wealth of choices for image hooks that may suite nearly anybody’s tastes. Beneath is a only a small pattern of the choices out there at Home of Vintage {Hardware} which has the biggest choice I’ve discovered.
Some sources for footage hooks that I’ll use once I’m in want are listed under to your comfort.
How To Set up Image Rail
Image rail is definitely stunningly easy to put in and is a superb choice whether or not you’ve drywall or plaster partitions.
The one actual willpower it’s essential to make is how excessive to hold your image rail. Sometimes, it was put in a foot or so under the ceiling. Image rails had been typically positioned to align with the tops of door frames or home windows, creating a visible line across the room.
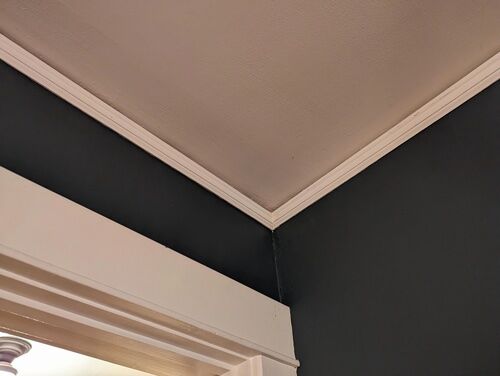
It may also be integrated into crown molding to have the image rail mix into the present moldings in some instances.
My preferences are inclined to observe the historic patterns which various by ceiling top. Right here’s information to a traditionally correct and visible pleasing set up:
- Ceiling Peak 8’ or much less – Set up 1/2” under ceiling
- Ceiling Peak 9’ or extra – Set up 4-6” under ceiling
- Ceiling Peak 10’ or extra – Set up 8-12” under ceiling
As ceiling heights dropped within the Nineteen Thirties image rail was typically discovered positioned lower than an inch from the ceiling main many individuals to imagine it was a some minuscule model of crown molding. Many painters unknowingly caulked these tight installations between the image rail and ceiling rendering it ineffective for hanging issues on with out restoration.
Step 1 Mark your Line
Upon getting a decided the peak you propose to put in your image rail then it’s time to undergo and mark a degree line throughout the whole room the place you may be putting in. You should utilize a laser degree or measure and mark manually with a pencil.
Step 2 Discover the Studs
To be sure you get a safe set up I’ve at all times suggested nailing straight into the studs on the wall. Discovering studs on a plaster wall may be troublesome, however I like to recommend a easy cheap device to make the job a lot simpler name a StudPop.
Locations a hash mark slightly below your degree line at every stud so yow will discover them when nailing.
Step 3 Reduce to Size
Image rail is greatest put in by slicing mitered joints on the corners. Coping doesn’t actually work as nicely for any such molding because it sits proud on the wall on the high.
Any lengths of wall which are past 8 ft ought to have scarf joints lower to hitch the 2 items of molding collectively moderately than a butt joint which might separate over time.
Step 4 Nail in Place
Nail in a single place and degree the image rail earlier than persevering with down the size of the molding. You’ll wish to make sure you nail by way of the portion that’s flush with the wall into each stud. Additionally, you should definitely place a nail by way of every scarf joint to tie the joints collectively. You’ll be able to add a dab of wooden glue to the joints as nicely for extra safety.
I like to recommend utilizing 2” or 2 1/2” lengthy 15 ga. nail. 18 ga. nails will not be sturdy sufficient to assist heavy paintings although they can be utilized for the headband joints to keep away from splitting.
When put in correctly most image rail can assist 40 lbs/yd with 16 O.C. studs.
Now you recognize what it’s an how you can use it’s going to you begin utilizing the present image rail in your own home or possibly set up it in some new rooms?

Subscribe Now For Your FREE eBook!

Founder & Editor-in-Chief
I really like previous homes, working with my arms, and instructing others the excitment of doing it your self! All the things is teachable in case you solely give it the possibility.