
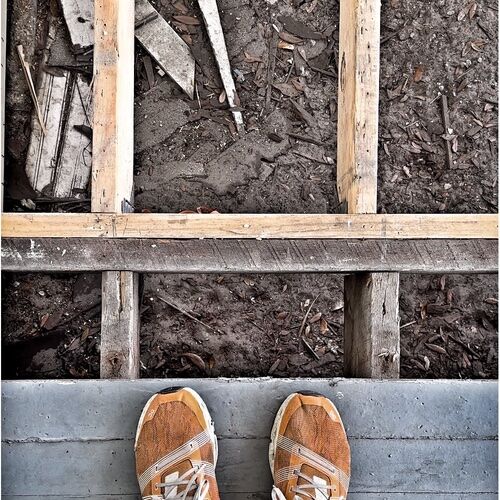
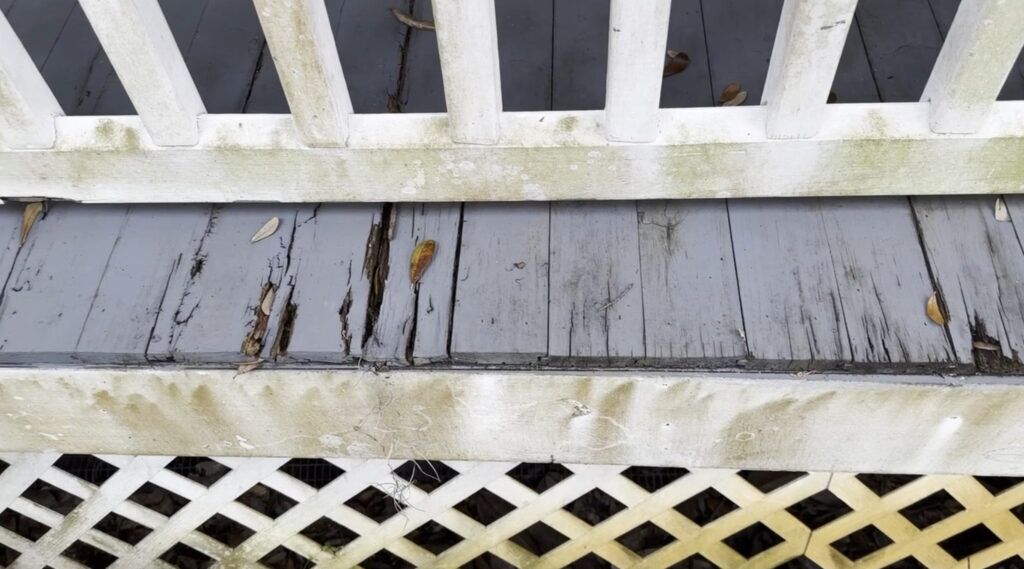
It looks as if each tongue and groove porch ground suffers from the identical downside. Finish rot. It is smart that the ends of the boards uncovered to the weather will soak up water and start to rot so quick it makes you wish to pull your hair out.
On my home, we have now an enormous wrap round porch which is one among our favourite elements of the home, however with over 1,500 sq. toes of porch flooring that left me with loads of rot over time. On this submit, I’ll present you not solely learn how to restore rotten or broken tongue and groove porch flooring, but in addition learn how to forestall the rot sooner or later.
The Fallacious Manner
I see this low cost manner of repairing on a regular basis and it drives me nuts. People will chop off the final 2-3 toes of the boards which are rotten after which substitute simply that half with a brand new board. Don’t do it!
It seems to be shoddy and it by no means lasts. I do know that you’re saving on supplies by doing it this manner, however actually the primary value of repairing a porch ground isn’t some additional tongue and groove flooring. It’s the all of the labor that’s concerned.
This lower and patch methodology creates one more joint the place water can get in and trigger points. It’s a joint that may separate inflicting gaps and lifted elements of your flooring. Finally, it’s an inexpensive repair that by no means pays off in my sincere opinion so skip it and do it proper.
The right way to Restore Porch Flooring…the Proper Manner
In case you’re going to do that the best manner, and why wouldn’t you, then you should utterly substitute any broken boards. “However Scott, how do I keep away from the rot from coming again once more?” Wait, I acquired you lined. What’s I’m proposing will work to forestall rot even within the rainforest in case you do it proper!
Conventional porch flooring is usually 1×4 however some uncommon functions are 1×6 in dimension so examine first. In case you’re changing porch flooring on a home constructed earlier than 1930 there’s a good probability that the flooring is probably not precisely the identical dimension as what’s presently accessible. If that’s the case you’ll have to both modify the brand new stuff or just rip out every thing as much as a sure space relatively than lacing in new boards amongst the previous.
The brand new stuff can fluctuate in dimension from the previous stuff by as a lot as 1/2” sometimes so do some checking on your home particularly whether it is older.
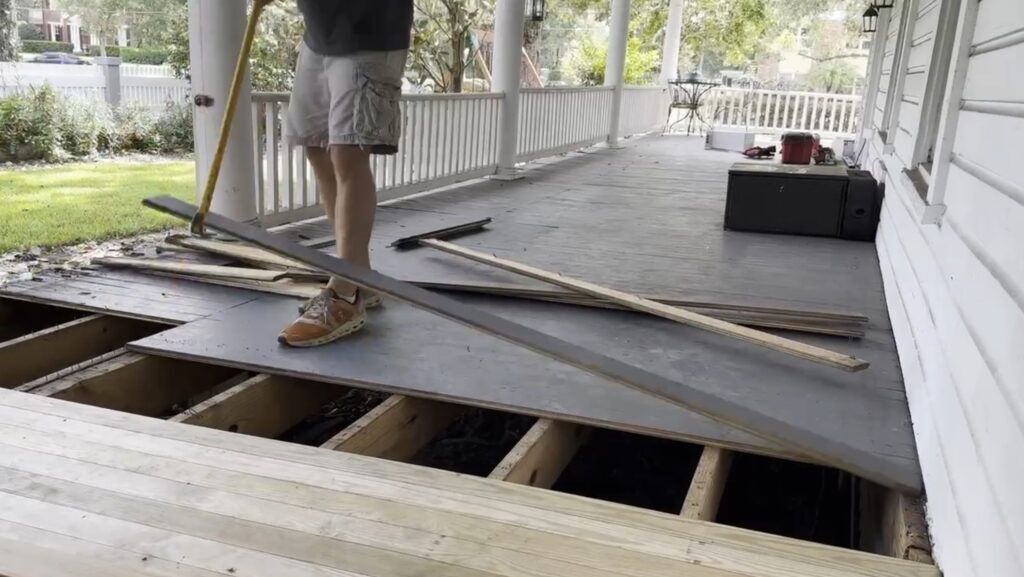
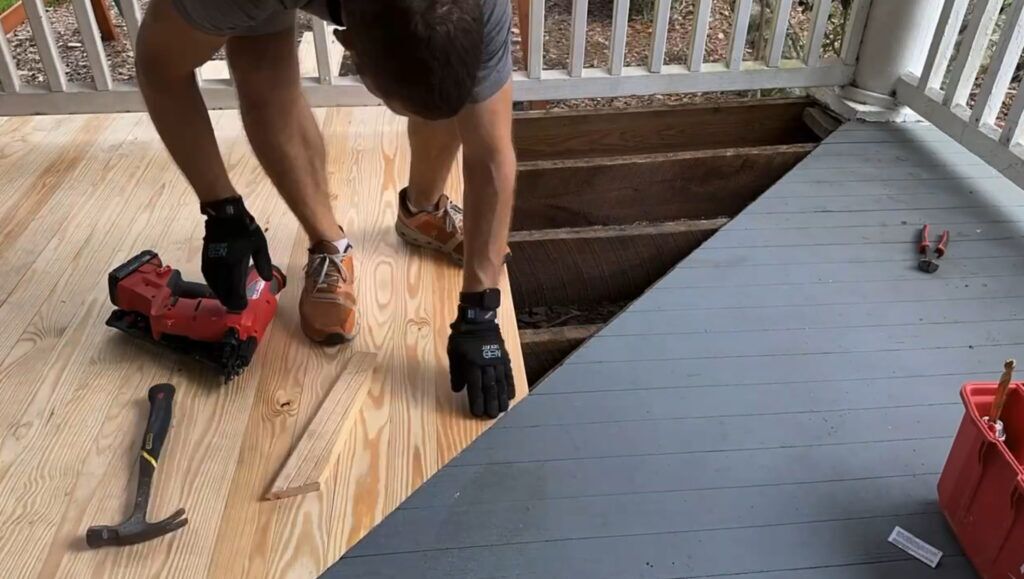
Step #1 Tear Out
Tearing out that rotten porch flooring is greatest completed with a giant crow bar. The primary piece may have to return out in items or you’ll be able to rip it out with a cat’s paw or smaller pry bar, however as soon as that one is out you’ll discover that the majority porch flooring is put in with only one nail per joist by means of the tongue of the board. That is referred to as blind nailing and it’s how we’ll be placing issues again collectively later.
Put the crow bar under the board and yank it as much as pop the boards free alongside the size. It gained’t take lengthy however it may be again breaking work in case you acquired quite a bit to do like I did.
Step #2 Format
It’s crucial that you consider two main issues with regards to format. First, are you tying into an current ground that should match. If so then you definately’re most likely greatest to begin on the current flooring and comply with that spacing. You wish to keep away from a board that must be ripped down extra slim than the remaining in the course of the sphere. It seems to be novice. If in case you have a slim board on the skin on the finish that’s advantageous, however within the center? No manner.
Second, utilizing a framing sq. you should constantly preserve your boards perpendicular to the home. Porch flooring was design to run straight from the home to the skin of the porch at a 90º angle (this enables water to comply with the grain of the board and slope of the porch because it flows out and off your porch). Putting in boards parallel to the home is a bid “No, No.”
As you start putting in be aware that even a spacing error as small as 1/16” can add as much as over 6” out of sq. over 100 boards. Examine every board as you put in and ensure you are conserving it sq..
Step #3 Putting in Porch Flooring
When putting in your porch flooring you don’t have to fret in regards to the size of the boards as a result of on the finish we’ll be trimming every thing evenly. So for now simply make it possible for all of your boards are lengthy sufficient to have a 1-2” overhang. It doesn’t matter if the outer ends are barely and even drastically out of alignment at this level.
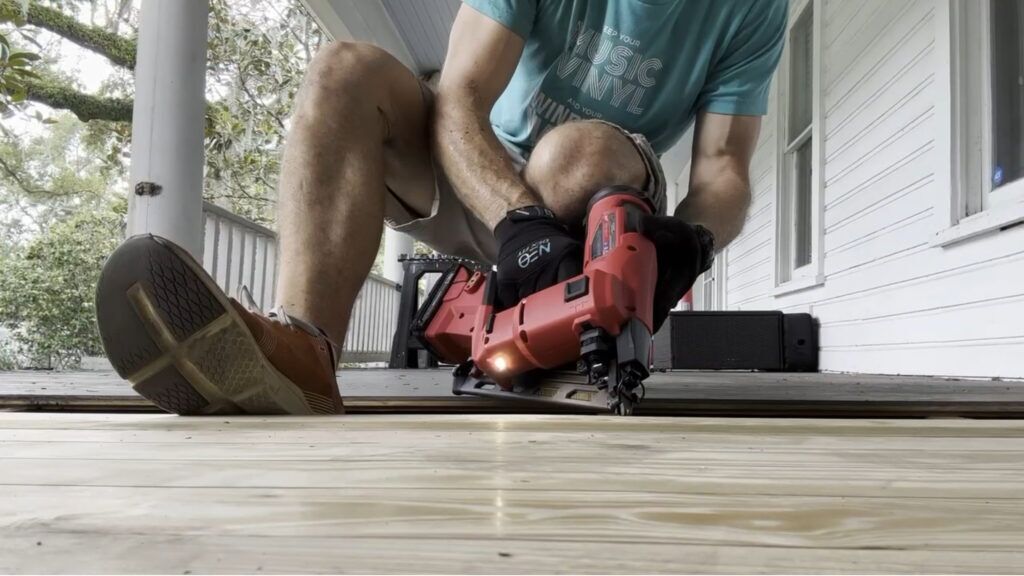
Whichever technique to resolve to put in all the time setup in order that the tongue is seen. This lets you set a board in place after which blind nail one nail by means of the tongue into every joist. No nails exhibiting makes for a cleaner and extra water tight set up.
Push the boards tight towards the home, giving an excellent 1/16” hole between boards for enlargement after which nail it in place utilizing a stainless-steel 2 1/2” 15 ga. nail. Repeat ad-nauseam and preserve the sample regular.
Bonus: Lacing in Boards
In case you’re solely doing particular boards relatively than an entire part then see my earlier submit Invisible Repairs For a Hardwood Ground on learn how to take away people boards and set up solely choose boards. In that submit I speak about hardwood flooring, however the identical method applies to porch flooring because it’s additionally tongue and groove.
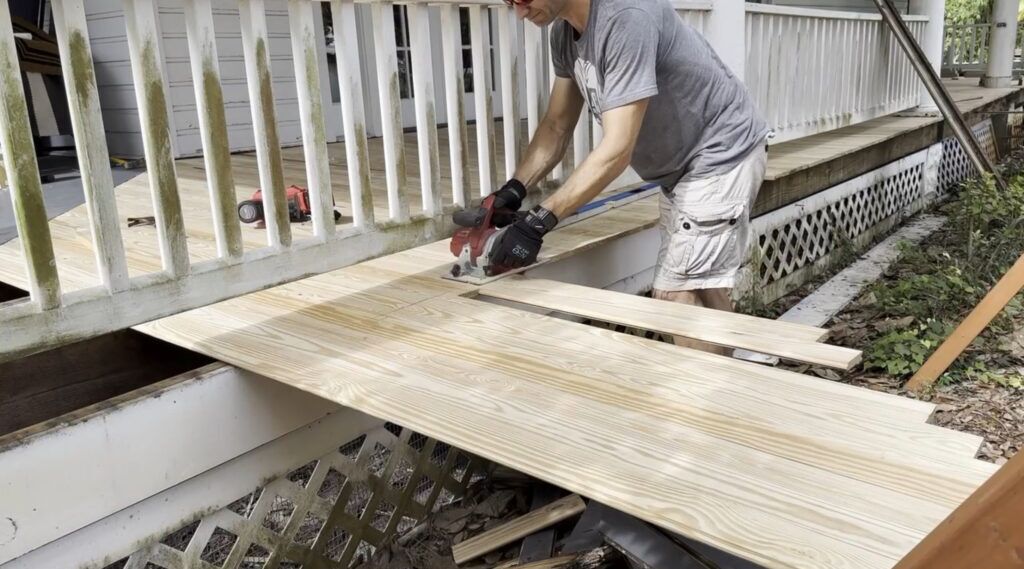
Step #4 Trim to Match
As soon as all of your boards are put in you should trim the ends to make every thing line up. The simplest manner to do that is by operating a chalk line throughout the skin edge the place you’ll go away a 1/2” to 1” (completely relies on your desire) overhang. Mark the chalk line after which utilizing a round noticed lower every thing to match that very same line. If in case you have some posts or railings in the way in which chances are you’ll want to make use of a jig noticed or hand noticed the end a few of the tighter spots.
Step #5 Sand Excessive Spots
Regardless of you greatest efforts you’ll have a number of areas the place the porch ground has some lips between a number of boards. If that’s the case then give them slightly sanding to degree issues out. Any lippage like that may be a visit hazard and also you wish to resolve this earlier than you begin portray.
Stopping Porch Flooring Rot
“You continue to haven’t answered my query about rot, Scott!” Okay, okay listed below are the steps I exploit to ensure my exterior tongue and groove porch flooring doesn’t rot.
Step #1 Use Handled Lumber
Most lumberyards will provide tongue and groove porch flooring in common pine or strain handled pine. The strain handled prices extra however lasts longer. It’s not bulletproof, however relatively than rotting in 2-4 years it should final 10-15 years so that could be a good place to begin, however we’re gonna take it even additional as a result of we would like a 30+ 12 months porch ground, proper?
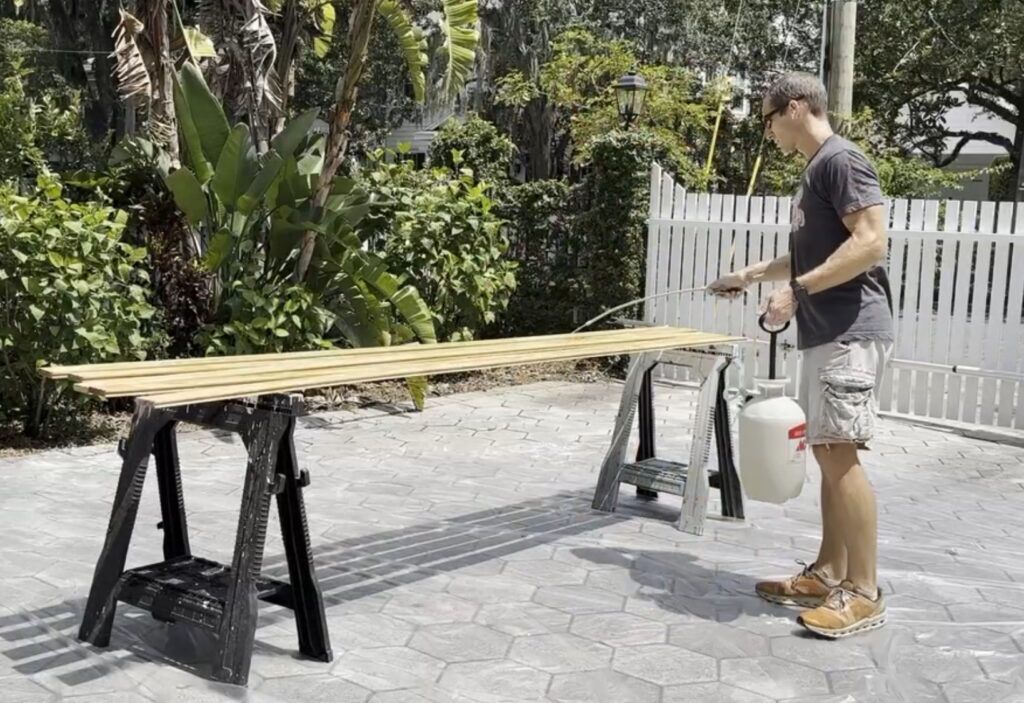
Step #2 Deal with with BoraCare
My favourite DIY remedy to forestall rot is BoraCare. Your combine it with some water and spray it onto all sides of the wooden with a pump sprayer. As soon as it’s dry you put in the wooden as standard and prime and paint it. No muss, no fuss. These items protects towards wooden destroying rot in addition to termites and different pests with a 30-year guarantee. Don’t skip this step!
Step #3 Glue the Ends
As soon as your set up is completed and you’ve got trimmed the ends of your porch flooring so every thing is lined up and fairly you should come by means of with a wooden glue like Titebond III and smear it into the top grain of all of the porch ground boards.
Finish grain is sort of a tremendous freeway for absorbing water which ends up in rot. By sealing the top grain with wooden glue previous to portray you set a roadblock on that superhighway and cease the wooden from absorbing water. You could have simply prevented rot.
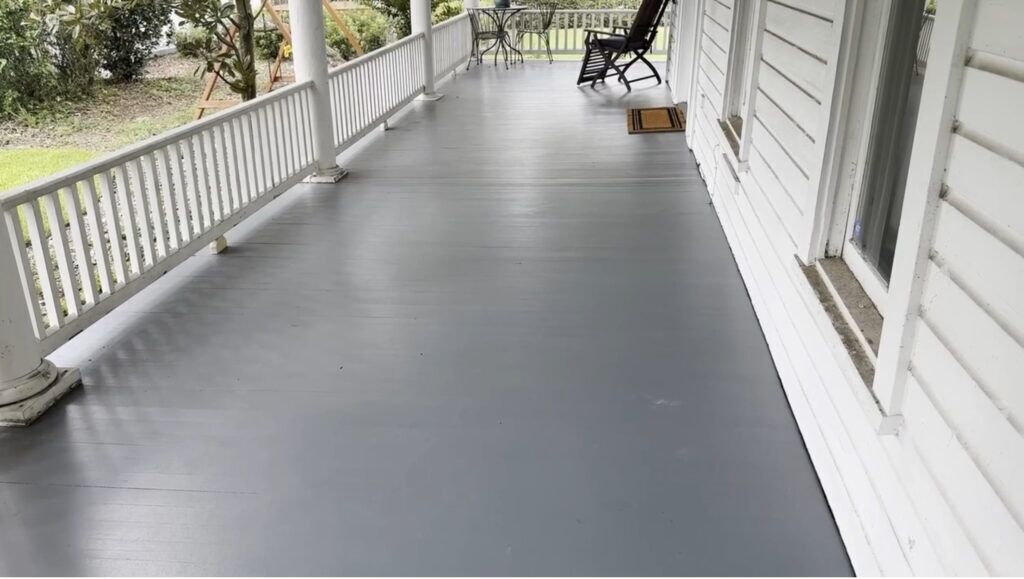
Step #4 Maintain it Painted
One very last thing, in case you preserve issues painted over time you’ll shield your funding and make it last more. A porch ground will get loads of visitors so you should sustain with the upkeep on that to forestall any pooling water or resolve points earlier than they grow to be huge issues.
My favourite paint for porch flooring has been SherCryl by Sherwin Williams. It sticks to wooden like white on rice and may deal with the heavy foot visitors porch flooring get.
Closing Ideas
In case you’ve acquired rotten porch flooring like I did, I hope this submit has given you the boldness to restore it. The video under will present you the entire course of that I went by means of together with some surprises I encountered and the way I handled them.
Don’t be intimidated by repairing tongue and groove porch flooring. It may be loads of work, however doing it your self can prevent tons of cash and be immensely satisfying work when you get to take a seat again and benefit from the view from a stable, rot-free entrance porch.
Subscribe Now For Your FREE eBook!

Founder & Editor-in-Chief
I like previous homes, working with my fingers, and educating others the excitment of doing it your self! All the pieces is teachable in case you solely give it the possibility.